The STEM Lab

The STEM Lab

by The Stem Lab
Understanding 3D Printer Filament Types: PLA, ABS, and PETG for Young Makers
AI
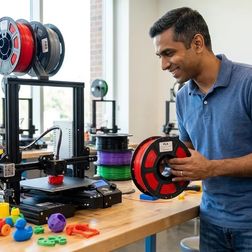
Ever watched a kid's enthusiasm deflate after their 3D print warped into a useless blob halfway through? The culprit usually isn't the printer or the design—it's the filament choice. This episode breaks down the three most common 3D printer materials—PLA, ABS, and PETG—through the lens of what actually matters for young makers: safety requirements, skill progression, and building real engineering intuition that transfers to future careers. PLA delivers 95 percent-plus first-print success rates and requires no ventilation, making it ideal for beginners and classroom environments, but it becomes brittle under sustained loads or temperatures above 60 degrees Celsius. ABS contracts nearly double the rate of PLA during cooling (0.8 to 1.0 percent), which explains why prints warp and lift off the bed—solving this requires heated beds at 90 to 110 degrees and draft-free enclosures. PETG bridges PLA's ease of use with ABS's durability, offering chemical resistance to oils and weak acids plus outdoor UV tolerance, but its hygroscopic nature means moisture absorption will ruin prints if filament isn't stored with desiccants. The temperature variables young makers adjust—nozzle heat, bed temperature, cooling rates—mirror actual process control parameters used in injection molding and manufacturing engineering careers. Layer adhesion works differently across materials: PLA relies on mechanical interlocking, ABS achieves solvent-like welding between layers, and PETG balances both mechanisms—explaining why PLA splits along layer lines while ABS bends before breaking. Starting with PLA builds confidence, but progressing to ABS and PETG teaches thermal management and material science fundamentals that easy-to-print materials never reveal. Read the full article: https://stemlabguide.com/understanding-3d-printer-filament-types

How to Choose Your First 3D Printer for Teen STEM Projects
AI
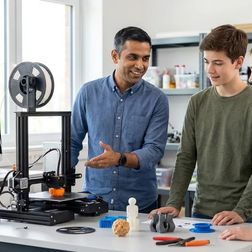
Most parents spend hundreds of dollars on a 3D printer only to watch it collect dust after a few prints—not because their teen lost interest, but because the machine wasn't matched to an actual learning path. In this episode, Rajiv Patel draws on over fifteen years of additive manufacturing experience to break down exactly what matters when choosing a first printer for teens aged thirteen to eighteen. Whether you're a parent or educator, you'll learn how to evaluate build volume, print quality specs, and workspace requirements to ensure this investment builds real CAD-to-prototyping skills rather than becoming an expensive paperweight. The sweet spot for build volume is 220 by 220 by 250 millimeters—this handles 94% of educational and hobby projects without the frustrating heat-up times and calibration complexity of larger machines that actually discourage iterative learning. Layer height marketing is mostly noise; 0.2mm layers offer the ideal balance for beginners, providing visible learning opportunities and reasonable print times while being forgiving of early calibration mistakes. Additive manufacturing technician roles are projected to grow 23% through 2030 with median salaries exceeding $58,000, making FDM printing fundamentals directly transferable to mechanical engineering and product design careers. Your workspace needs more planning than you might expect: a dedicated 15-amp circuit, stable surface rated for 15–25 pounds, and ventilation meeting at least half an air change per hour (with HEPA filtration recommended for ABS printing). Direct drive extruders outperform Bowden systems when it comes to handling flexible filaments like TPU, while lead screw Z-axis systems provide better layer consistency than belt-driven alternatives. Before buying, measure your teen's actual project ideas with calipers—if 90% fit within 200 cubic millimeters, paying for 300mm capability wastes money and adds unnecessary complexity. Read the full article: https://stemlabguide.com/how-to-choose-your-first-3d-printer-for-teen-stem-projects

Complete 3D Printer Safety Checklist for Kids and Teens
AI
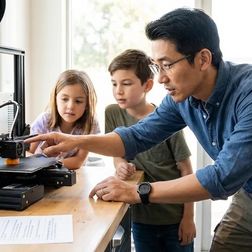
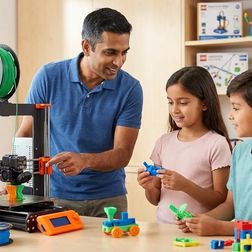
Whether you're setting up a 3D printer for your child's first project or managing a school makerspace, knowing which safety concerns actually matter—and which are overblown—can be the difference between confident supervision and constant anxiety. In this episode, fabrication lab consultant Kazuki Tanaka shares the exact safety framework he uses when auditing makerspaces for insurance compliance, drawing from eight years of experience supervising kids as young as eight. You'll learn how to set up your workspace, choose the right equipment, and establish protocols that prevent the injuries that actually happen in real printing environments. Your workspace setup determines roughly 80 percent of safety outcomes—place printers on stable, heat-resistant surfaces with at least 15 centimeters of clearance on all sides and one meter minimum from anything flammable. For children ages 8–12, position the printer so the build plate sits at chest level, which prevents them from reaching over hot components like the nozzle and heated bed. Enclosed printers are strongly recommended for makers under 14 or those prone to distraction, as enclosures physically prevent fingers from reaching moving belts, hot nozzles, or the build plate mid-print. Every printer should have a physical emergency stop button that users can locate and press with their eyes closed—building muscle memory before the first print matters when someone gets startled. Most 3D printing injuries are minor burns from touching hot nozzles or pinched skin from moving parts, so keep a basic first aid kit with burn gel and tweezers within arm's reach. Configure slicer software with maximum temperature limits appropriate for each filament type—for PLA, cap the hot end at 220°C and the bed at 70°C to prevent inexperienced users from accidentally overheating materials. Read the full article: https://stemlabguide.com/complete-3d-printer-safety-checklist-for-kids-and-teens

What Is FDM 3D Printing: Technology Explained for Young Learners
AI
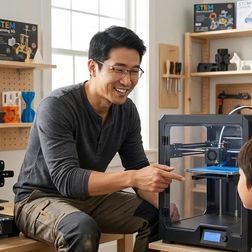
The same 3D printing technology that aerospace companies use to manufacture jet engine components is now accessible enough for kids to use in their bedrooms. In this episode, Rajiv Patel breaks down FDM 3D printing—what it is, how it works, and why it's become the most practical entry point for young learners exploring additive manufacturing. Whether you're a parent setting up a home STEM lab or an educator looking to introduce real manufacturing workflows, this episode answers the essential question: what do kids actually need to know about FDM technology to build genuine engineering skills? FDM (Fused Deposition Modeling) builds objects by extruding melted plastic filament layer by layer, making it fundamentally different from resin or powder-based 3D printing methods that require more complex safety precautions and material handling. The technology became affordable for education after key patents expired in 2009, driving printer costs from over $15,000 down to under $300 for capable educational models. The FDM workflow follows four stages—design, slicing, printing, and post-processing—giving young learners hands-on experience with the same CAD-to-physical process used in professional engineering firms. Slicing software is where real engineering decisions happen: students learn to balance trade-offs between layer height, infill density, print speed, and structural strength, then observe the consequences when parts fail under stress. PLA filament is ideal for young learners because it prints at lower temperatures (190–220°C), requires no heated enclosure, and eliminates many safety concerns present with materials like ABS. Skills gained from FDM printing—tool path planning, iterative design thinking, and dimensional accuracy—appear directly in job descriptions for mechanical engineering, product design, and manufacturing roles. Read the full article: https://stemlabguide.com/what-is-fdm-3d-printing

Enclosed vs Open Frame 3D Printers for Kids: Safety and Performance Compared
AI
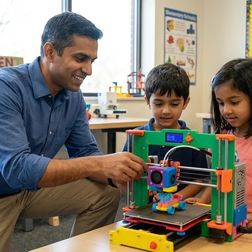
Choosing a 3D printer for your child involves more than just comparing price tags—it's a decision that affects their safety, learning trajectory, and the skills they'll carry into future maker projects. This episode dives into the real differences between enclosed and open-frame 3D printers based on over 800 hours of observation with young learners ages 8 to 17. Whether you're a parent setting up a home workshop or an educator outfitting a makerspace, you'll discover which design actually matches your supervision capacity, material needs, and long-term educational goals. Enclosed printers offer HEPA filtration, finger guards, and automatic door shutoffs, allowing parents to leave the room during prints—but this protection can create a false sense of safety that limits hazard awareness development. Open-frame printers require constant supervision for kids under 13, yet learners using them diagnosed bed adhesion failures 40% faster than those on enclosed machines because they could see problems as they happened. Material choice should drive your decision: PLA works safely on either design, but ABS and PETG require enclosed printers with filtration—open-frame ABS printing spiked formaldehyde levels to 8x higher than the same print in an enclosed machine. Thermal stability dramatically affects print success, with enclosed printers showing only 5–8°C temperature variance compared to 12–15°C swings on open frames, resulting in 35% fewer warp failures. Budget differences are significant—youth-appropriate enclosed models run $350–$900 while comparable open-frame printers cost $200–$500, though consumable costs remain identical. Each design builds different career-relevant skills: enclosed printers mirror industrial Stratasys and Ultimaker systems used in prototyping careers, while open frames teach mechanics-first troubleshooting that transfers to advanced CoreXY builds. Read the full article: https://stemlabguide.com/enclosed-vs-open-frame-3d-printers-for-kids

Best Beginner 3D Printers for Elementary School Students
AI
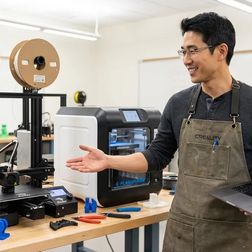
When your kid graduates from crayons to Tinkercad and starts designing articulated robot arms, suddenly you need a real 3D printer—but the market is flooded with machines that either lack essential safety features or require technical troubleshooting far beyond elementary capabilities. This episode breaks down what actually matters when choosing a 3D printer for kids ages six to twelve, based on testing seventeen models against real-world household conditions. You'll learn which specifications enable independent operation and which marketing claims to ignore entirely. Build volumes of 100–150mm cubed hit the sweet spot for elementary projects—kids ages six to nine rarely design objects over 120mm and lose patience with prints longer than eight hours, making massive build plates counterproductive. Enclosed printers allow limited unsupervised operation once kids learn verification protocols, while open-frame machines require constant adult presence due to 200°C print heads and curious sibling risk factors. Software progression matters more than raw features—look for three-tier interfaces that start with one-button simplicity for early grades and scale to full parameter control by grade six, mirroring professional CAD-to-manufacturing pipelines. Proprietary filament systems with RFID-chipped cartridges inflate annual costs by $120–180 compared to printers accepting standard 1.75mm PLA from any manufacturer, based on typical elementary consumption of half a kilogram monthly. Automatic bed leveling eliminates the failure mode responsible for 60–70% of beginner frustration—manual systems universally failed tests where kids ages seven to eleven attempted independent print initiation after deliberate de-leveling. Hidden software subscriptions can inflate total ownership costs well beyond the purchase price, so prioritize models offering lifetime slicing tool access over annual licensing schemes. Read the full article: https://stemlabguide.com/best-beginner-3d-printers-for-elementary-school-students

Creality Ender 3 vs Flashforge Adventurer: Which 3D Printer Is Better for Teens
AI
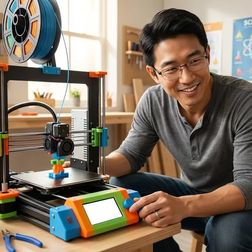
Choosing a 3D printer for a teenager isn't just about specs—it's about what skills they'll actually develop. This episode dives into hundreds of hours of real workshop data comparing the Creality Ender 3 V3 SE and Flashforge Adventurer 5M, revealing which machine builds genuine fabrication skills and which one prioritizes faster results. If you're a parent or educator trying to decide between a budget-friendly option that demands troubleshooting and a pricier enclosed printer that "just works," this breakdown challenges the conventional advice you'll find elsewhere. The Ender 3's assembly process serves as a skill checkpoint—teens who complete it demonstrate spatial reasoning and mechanical aptitude, while those who bail often won't maintain the machine long-term. The Ender 3 teaches manual calibration, g-code literacy, and hardware troubleshooting that transfers directly to industry tools, while the Adventurer 5M focuses on CAD-to-print workflow and rapid design iteration. A hidden design flaw in the Ender 3's cooling fan shroud causes curling on steep overhangs, requiring teens to successfully print a replacement part before they can fix the printer's weakness—frustrating circular logic for beginners. The Adventurer 5M's proprietary filament cartridge system locks users into Flashforge's ecosystem at $25–30 per kilogram versus $15–20 for generic PLA, and hacking standard spools voids the warranty. Software matters significantly: the Ender 3 works with industry-standard Cura and PrusaSlicer offering full g-code control, while the Adventurer uses proprietary FlashPrint with limited third-party support. The cheaper printer may cost more long-term through upgrades and time investment, but that "frustration tax" might be exactly what builds transferable technical skills. Read the full article: https://stemlabguide.com/creality-ender-3-vs-flashforge-adventurer

Best Budget 3D Printers for Kids Under $300
AI
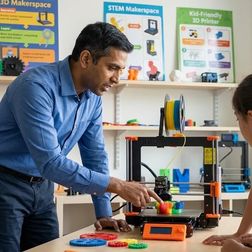
Budget 3D printers have reached a turning point—machines under $300 now deliver capabilities that cost thousands just five years ago. But with massive quality differences hiding in that narrow price band, how do you choose one that actually builds skills rather than becoming a closet ornament? Host Kazuki Tanaka breaks down findings from over 200 hours of hands-on testing with seven different models, revealing which printers help kids persist through the learning curve and which ones create more frustration than inspiration. Auto-leveling systems add $40–60 to manufacturing costs but are worth every cent for young users—three failed prints in a row from bed leveling issues is the fastest way to kill a kid's interest in 3D printing. Enclosed printers are essential for unsupervised use with elementary-age children, preventing burns and containing fumes, while open-frame designs teach more about mechanics but shouldn't be used independently until around age thirteen. Proprietary slicers and filament requirements trap users in vendor ecosystems and inflate ongoing costs by 2–3x—starting kids on industry-standard software like Cura means they're learning the same tools aerospace engineers use. Most budget machines reliably print PLA at $15–20 per kilogram, but claims of PETG and ABS compatibility often fall short because sub-$300 hotends struggle with temperature stability above 240°C. SD card file transfer beats WiFi printing for educational settings despite feeling old-school—it's more reliable and forces kids to learn file management skills that mirror professional manufacturing workflows. The Creality Ender 3 V3 SE emerges as a top pick for teens, offering auto-leveling, direct drive extrusion for flexible filaments, and unmatched community support where every problem has already been solved and documented online. Read the full article: https://stemlabguide.com/best-budget-3d-printers-for-kids-under-300

Best 3D Printers for Kids and Teens: Complete Buyer's Guide for Educational STEM Learning
AI
Most parents shopping for a kid-friendly 3D printer end up with an expensive paperweight that teaches nothing but frustration. In this episode, Rajiv Patel draws on eight years of experience watching which machines actually produce students who land engineering internships with real skills. He breaks down the critical differences between printers marketed to families and those that build genuinely employable competencies—covering everything from CAD workflows to the hands-on troubleshooting that mirrors professional product development. The best educational 3D printers share three traits: minimal troubleshooting that derails learning, compatibility with industry-standard CAD software, and durability to survive repeated failures during skill building. Open-frame printers frustrate beginners more than enclosed systems, but they teach root-cause analysis—a higher-value skill in today's hiring market than simply clicking "Print" on a black-box machine. The real learning objective isn't the printed object itself; it's the iterative cycle of modeling in CAD, optimizing slicer settings, diagnosing failures, and adjusting parameters—the same loop used in professional product development. First-layer adhesion determines print success more than any other variable, requiring bed leveling accurate to 0.05 millimeters—and manually adjusting this builds mechanical intuition that transfers to real engineering work. Understanding slicer parameters like layer height, infill density, and print speed teaches applied physics and manufacturing tradeoffs: strength versus material cost, speed versus surface quality, complexity versus failure risk. Common failure modes like warping, stringing, and clogging each have multiple potential causes, turning every failed print into a scientific method exercise of hypothesis testing and controlled variable experimentation. Read the full article: https://stemlabguide.com/best-3d-printers-for-kids-and-teens

How to Measure Solar Panel Efficiency in Science Projects

AI
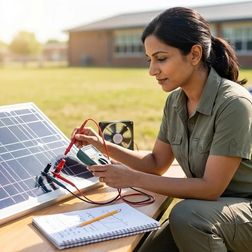
Most science fair projects involving solar panels fail before they even begin—because students measure voltage alone and call it efficiency. In this episode, Lakshmi Venkataraman breaks down the complete process for accurately measuring solar panel efficiency, from understanding the real formula to setting up proper circuits and documenting results like a professional engineer. Whether you're a middle school student tackling an NGSS-aligned project or an educator guiding hands-on energy investigations, this guide transforms a simple demonstration into authentic scientific inquiry. You'll learn why you need both voltage and current, how to calculate light power input, and what efficiency percentages you should actually expect from educational panels. Voltage measurements alone tell you almost nothing about efficiency—you need both voltage and current under load conditions to calculate electrical power output using P = V × I. Solar panel efficiency is calculated by dividing electrical power output by light power input, then multiplying by 100; light power input requires knowing both light intensity (watts per square meter) and your panel's surface area. Always measure the active photovoltaic surface area, not the plastic or metal frame—and photograph your panel next to the ruler immediately to prevent measurement errors that propagate through all your calculations. Educational solar panels typically perform in the 5–15% efficiency range, while commercial silicon panels achieve 15–22%—this gap creates valuable discussion opportunities about real versus theoretical performance. Your equipment list should include a digital multimeter, a resistive load (10–100 ohm resistor, small DC motor, or LED), a light source with known wattage, and a lux meter or smartphone app to measure light intensity. Optional additions like a protractor for angle testing, neutral density filters to simulate clouds, or an infrared thermometer for temperature variables can elevate a basic project into a multi-variable engineering investigation. Read the full article: https://stemlabguide.com/how-to-measure-solar-panel-efficiency-in-science-projects
12 of 15