As podcasters, we are always looking for ways to grow our follower and fan base.
Transcribing your episodes is one of the easiest things you can be doing to maximize your efforts and reach new audiences.
There are plenty reasons why podcasters should be transcribing their episodes including:
- You can repurpose your transcripts as blog posts, social media posts and other types of content to help you expand your reach.
- Transcripts can provide you with a point of reference when editing which can help you identify areas that need improvement.
- Transcripts can increase audience engagement by allowing your listeners to follow along and take notes.
- Transcripts makes your content accessible for those who are hard of hearing or deaf.
- Transcripts give search engines like Google text to crawl and index which can increase the visibility of your episodes in Google Search.
Below are the best ways to generate episode transcripts for your show.
Transcribe Your Podcast Episodes for Free with RSS.com
While other podcast hosts charge for transcripts, RSS.com offers free, automatic transcriptions for all of your podcast episodes.
Generating a free episode transcript with RSS.com is easy, just follow these steps:
Step 1: Log in to your RSS.com dashboard, or create a free RSS.com account here.
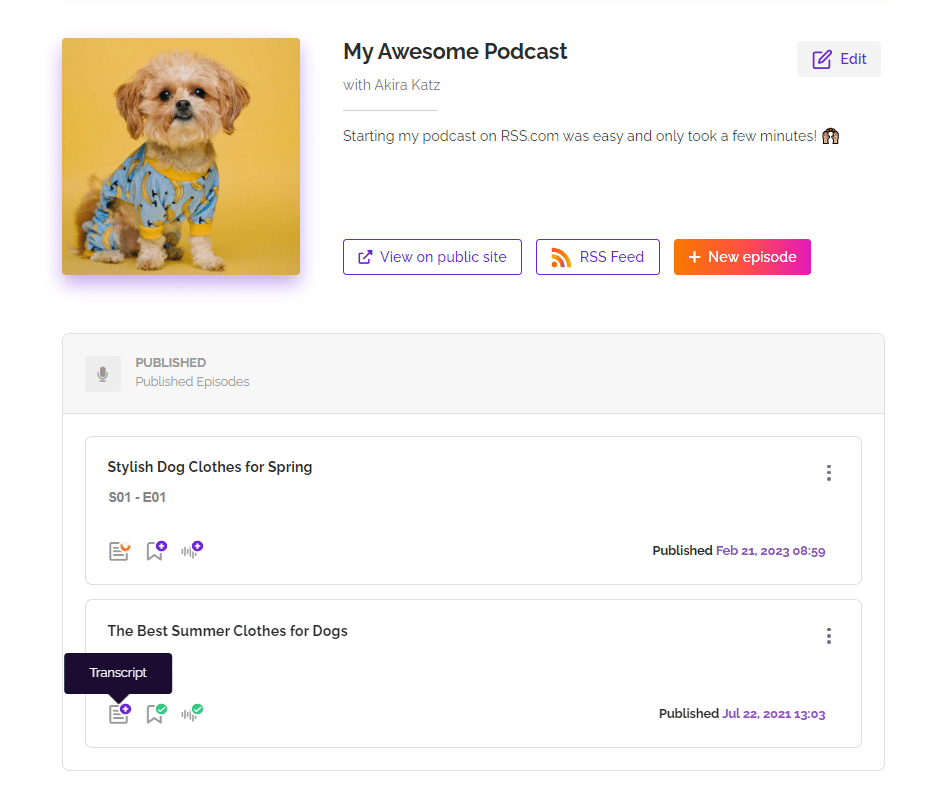
Step 2: Select the transcripts icon on one of your episodes.
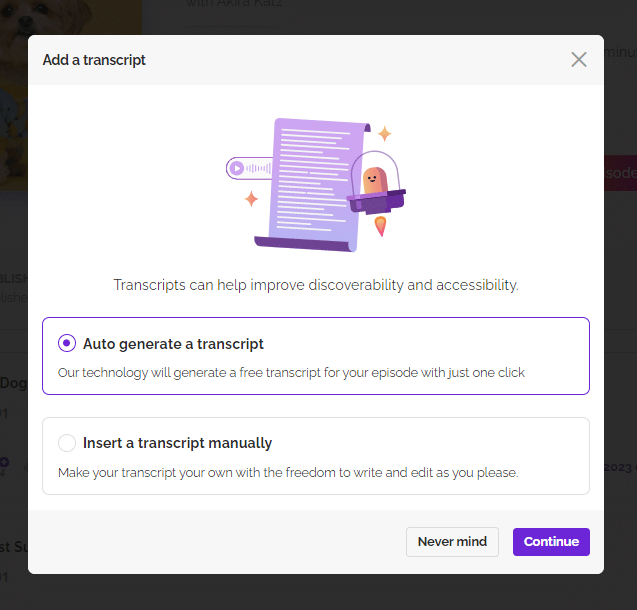
Step 3. A pop up will appear – select “Auto generate a transcript” and then the level of accuracy you’d like (higher accuracy takes a little longer to create).
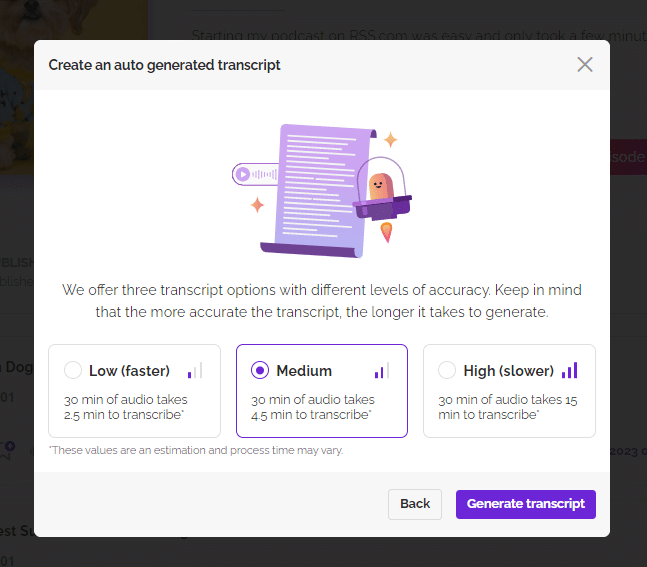
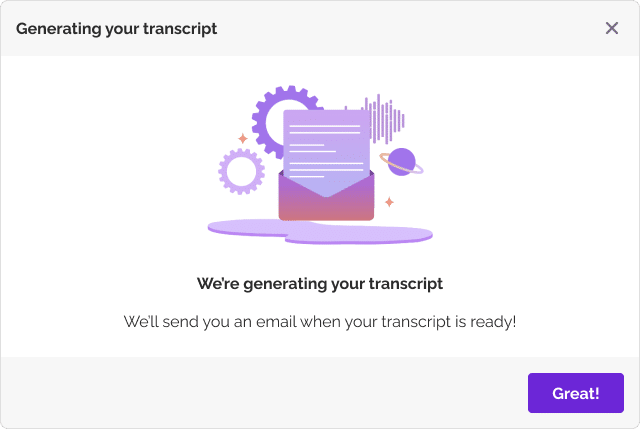
Step 4. Select “Generate transcript” and sit back and relax while your transcript is created. You’ll be sent an email when your transcript is complete.
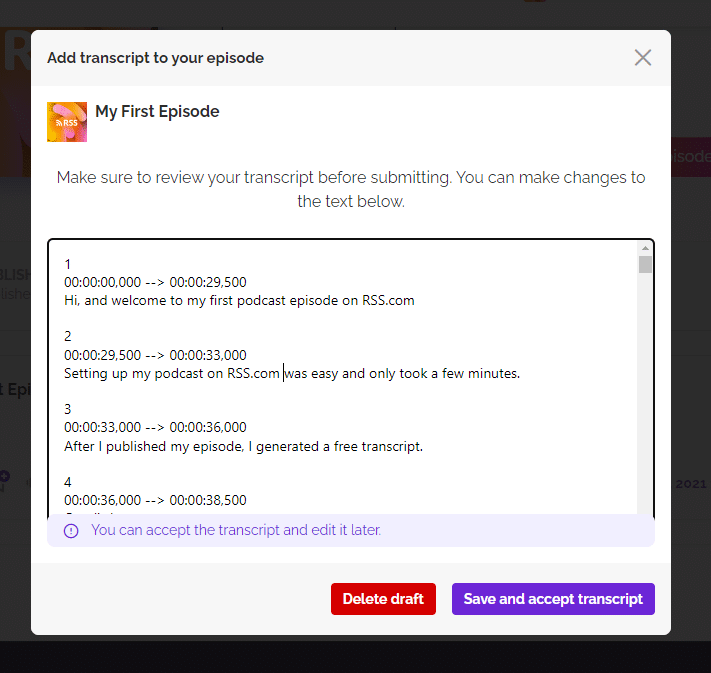
When your transcription is complete, you can review and make edits directly in your RSS.com dashboard before saving.
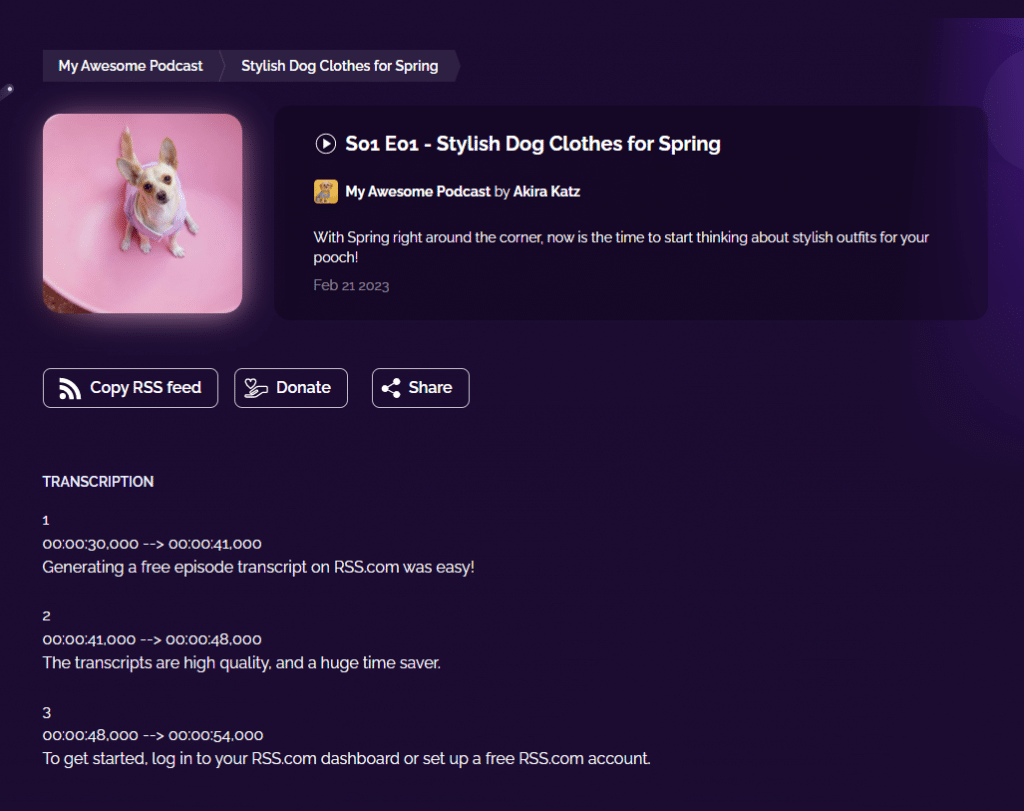
Once you have accepted the transcript, it will automatically be added to your public episode page.
🎬 Click to learn how to convert your podcast episodes into engaging videos for free!
Transcribe Your Podcast for Free with Google Recorder
Google Recorder is a smartphone application that allows you to record audio and transcribe what you record live.
To use the app, open it on your phone and begin recording to it at the same time that you start recording your podcast in Audacity, GarageBand, or your favorite recording software.
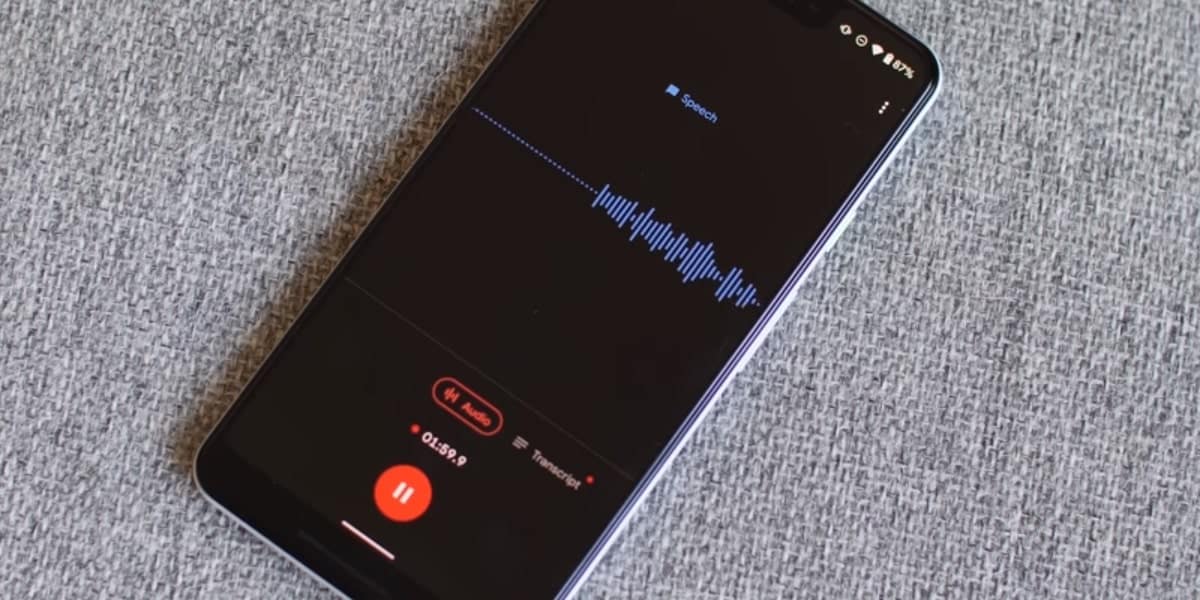
As you speak, your phone’s microphone will pick up the audio, and the words will be automatically recorded and transcribed into the application.
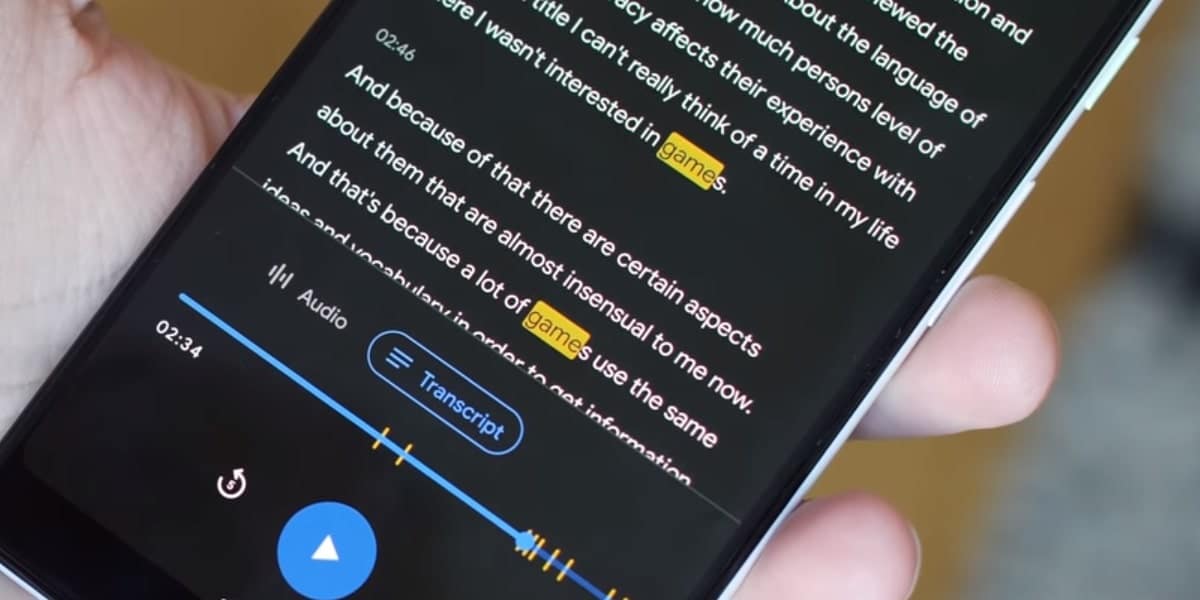
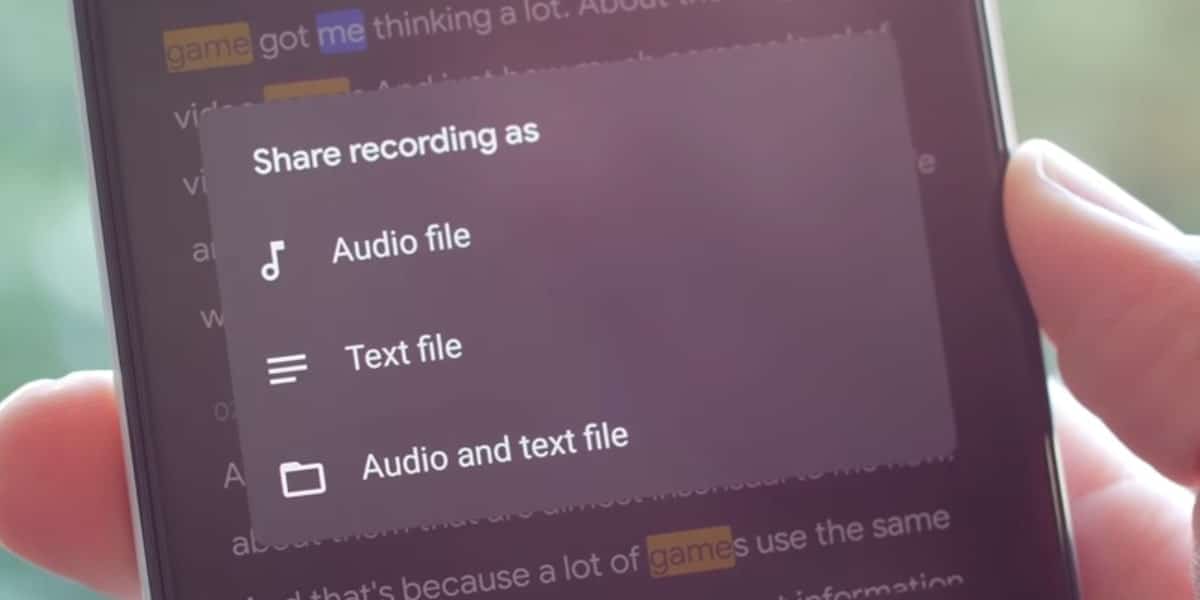
Once you have finished recording, click stop on the app, and you will be able to save and share the files.
You can choose to share the audio, the transcription text, or both. Alternatively, if you don’t want to share them, you can save them to your Google Drive.
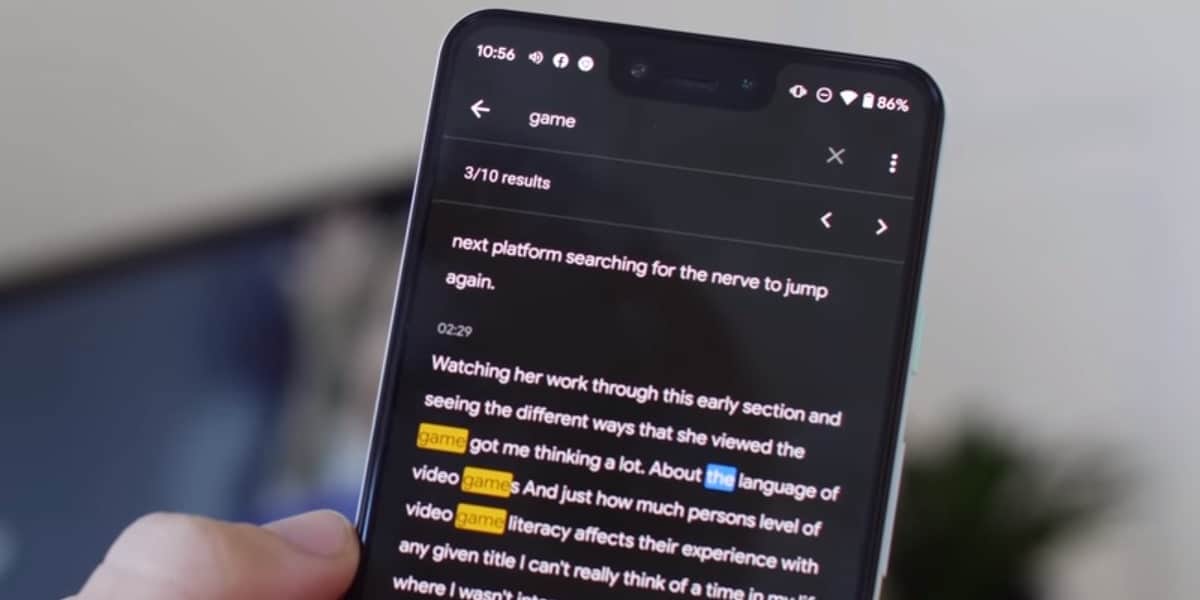
One benefit of this transcription application is that it is searchable. What this means is if you’re looking for a specific word or phrase you said, you can type it into the app’s search function and find every point in your audio and transcription that you said that word or phrase while recording.
Now for the bad news. According to Android Authority, “Google Recorder was exclusive to the Google Pixel 4 series at first. It then rolled out to some older Pixel devices but hasn’t moved on to other, non-Pixel devices yet. At least, not in an official capacity.”
The good news is that savvy app developers have created a workaround for other devices to be able to use Google Recorder. We recommend reading this post from Android Authority for guidance on how to use the app without a Pixel phone. However, as with all applications and “hacks,” we also recommend that you do your research before simply downloading and using them to avoid the risk of breaking your phone or opening it up to potential malware issues.
How to Use Google Docs Voice Typing for Transcriptions
Though this option will require you to speak every word of your podcast audio a second time, an alternative to the Google Recorder app is to use Google Docs Voice Typing tool in Chrome.
Their voice typing is fairly accurate, and it will provide you with a transcript in document form that you can add additional notes and formatting too. After cleaning up your transcription, and adding any other notes you would like, you can then copy and paste your text directly into your blog post/website page for your podcast episode.
How to Use YouTube Transcripts
Did you know that YouTube has a free transcription feature? If your podcast is on YouTube, then this will be another alternative for transcriptions.
YouTube transcripts don’t require you to speak the words of your recording a second time. Instead, you can simply add a single image to your audio and convert it into a single image video using software like One Image Video, and then load the MP4 file onto your YouTube channel.
Once you have uploaded your podcast episode on YouTube, enable captions, and your YouTube video will create a generic transcript.
Click publish, and then go to the video link on a desktop, and click on the 3 horizontal dots next to the SAVE option, and you’ll see an “Open transcript” option.
Click that button, and you’ll be given the rough transcript that you can select, copy, and paste into a word processing document for editing
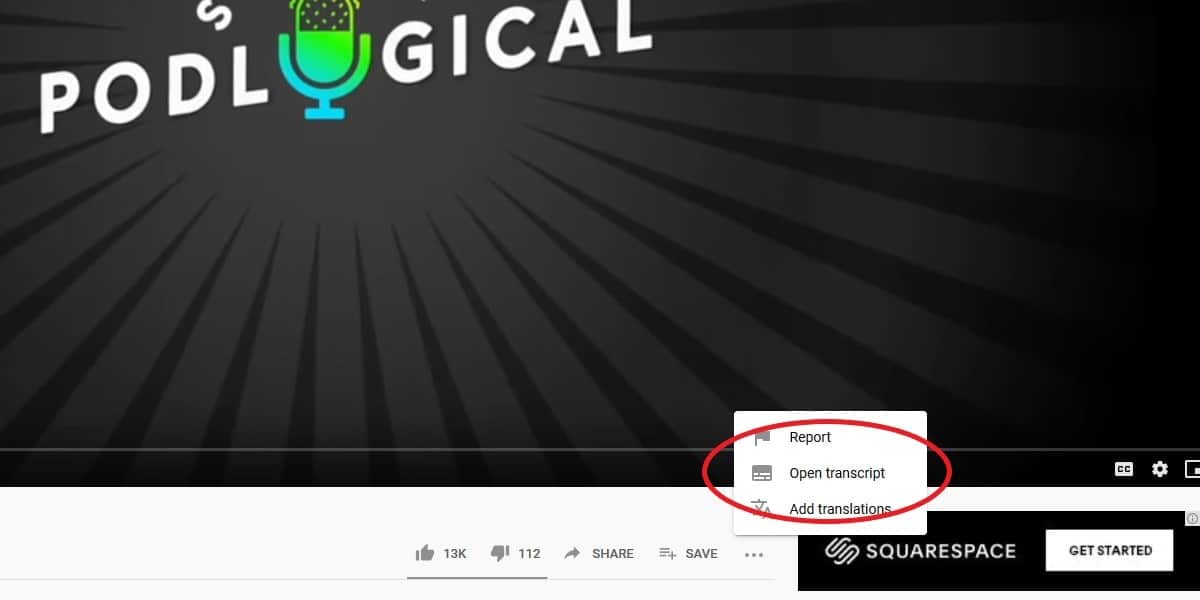
YouTube transcriptions tend to be a little less accurate.
Because of this, you might need to spend a little while editing the transcript it generates before you publish it on your website.
After you’ve saved your transcript, it’s up to you whether or not you choose to leave your podcast video up on YouTube. Some podcasters like to leave their one image videos up on the platform in an effort to reach more audiences.
How to Use Zoom to Transcribe Your Podcast
Are you using Zoom for your podcasts?
Did you know that Zoom has an audio transcription feature?
Once Zoom’s transcription feature is enabled, you can download a transcription of your meeting.
So, how do we use Zoom transcription?
Select the settings tab. Next, go to the recordings tab. Check off the “Select Audio Transcript”. The final step (at this stage) is to record. Close out of the settings and click “Record” on the bottom Zoom taskbar.
Then, just start recording your podcast like you normally would. If someone in the session needs real-time captions, you or a co-host can edit and correct the transcription as needed. If not, there will be an opportunity to edit and finalize the transcription afterwards.
After the Zoom recording, you will receive an email from Zoom with the subject line “Audio transcript for the recording xxx is now available”. Click the link in the email or via your Zoom cloud to access your recording.
All that’s left is to view the recording, and match your actual audio with the transcription. Select “Edit” for incorrect text and then click “Save” when it is corrected. Once changes are made in the transcript, the caption will automatically update too.
📘 Related Reading: How to Start a Podcast on YouTube.
💡 Pro Tip: Here’s How to Record Your Podcast Using Zoom.
Other Options for Transcribing Your Podcast
Here’s a list of even more free transcription software programs for you to check out:
- OTranscribe
- Express Scribe
- The FTW Transcriber
- Inqscribe
- Podscribe
- Temi allows you to record up to 45 minutes free and get a transcript for your audio. After that, you pay $0.25 per minute. There are no subscriptions or contracts to use Temi.
✨ Here’s a post that dives deeper into these options. We hope you find one that works well for you!
Paid Transcription Services
Descript and Otter both offer monthly transcription subscriptions with Otter’s paid plan beginning at $8.33 per month and Descript’s beginning at $12 per month.
Descript is a little higher in price because they offer Studio Sound effect which cleans up your podcasting audio using AI, audio and video editing and unlimited screen recordings.
If you opt for the free trial of Descript, you can get three hours of transcription regardless of the number of files you choose to import.
With Otter on the other hand, you can only import up to three files, and each transcript is limited to 30 minutes. Still, if you’re wanting a way to try AI transcripts, it’s hard to beat free!
📘 Related Reading: Use Episode Transcripts for ADA Compliance
Are You a Visual Learner?
Check out this awesome video below from 9to5Google that walks you through how to use Google Recorder.


